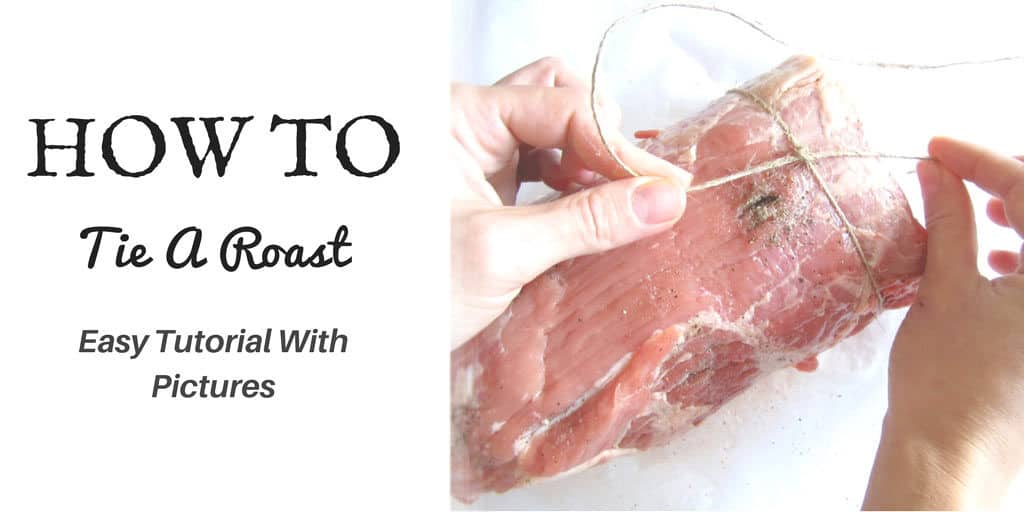
Is It Difficult To Tie A Roast?
Have you ever wondered how to tie a roast? Has the idea of doing it yourself sounded ehm...complicated? I've been there. I thought it was something 'out of my league' since I'm so lousy with knots and tying things up. I mean I cannot even tie my dog's leash without a 30% possibility of it going away ( has happened so many times).
Anyways, I decided to try it once I saw the way a chef did it. It looked pretty simple so I said hey why not give it a go? And it was as simple as it looked and it ended up looking as good as he did it. So the answer to the question - Is it difficult to tie a roast? NO, it isn't! And that's why I'm writing this How To Tie A Roast Tutorial to show you.
When And Why To Tie A Roast
Before you start tying up your roast take a quick peek, to see why we tie a roast after all. I mean other than the obvious to keep a filling or stuffing in place, there are some occasions in which tieing is also preferred.
- It gives a nice shape to the roast.
- Tying helps to keep the meat juicy on the inside.
- The meat gets cooked evenly.
What Type Of Meat To Tie For A Roast
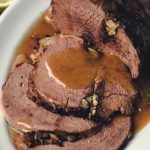
There are many types of meat parts that you can tie up like a roast. The simplest and easiest are chicken breasts, and pork or beef tenderloin. These are good for roasting since they are quick and easy to cook. There are also cheaper parts of meat though, that can also be tied like a roast. These are boneless pork shoulder for example or silverside beef. Cooking these meat parts takes hours and they also need to be covered. That's why stewing is preferred in most cases. In my tutorial here I'm using silverside beef.

Tools You Will Need:
Just a pair of scissors, and some twine. Either kitchen twine, or natural twine.

1. Tie the twine at one end of the meat.

2. Create a loop.

3. Without releasing the end of the twine that leads to the twine roll
slide the loop over the roast, and over the tied pork end.

It should look like this.

4. Pull the end of the twine tightly, to secure the loop.

5. Repeat steps 2, 3 and 4 until you reach the end of the meat.

6. Flip the meat. Cut the twine off the roll, leaving a piece of twine,
that's a bit longer than your piece of meat.

7. Pass the end of the twine through the last loop you made,
right at the end of the meat. Continue passing the twine through all
of the loops until you reach the other end of the meat.

8. Flip the meat one last time. Tie the twine right at the beginning
exactly where you made the first knot. Once your meat is cooked, cut the
twine where you made your first and last knot. This way, all the twine will
come off in one piece.
That's it, your roast is tied and ready to be cooked!


Leave a Reply